Pages

Tuesday, July 8, 2014

laundry room facelift

As a mom of three boys, I spend a LOT of time in the laundry room!  Above is the new, clean version I get to enjoy!  Below is the only before picture I have, and this was taken after I painted the walls, they were brown.  blah.
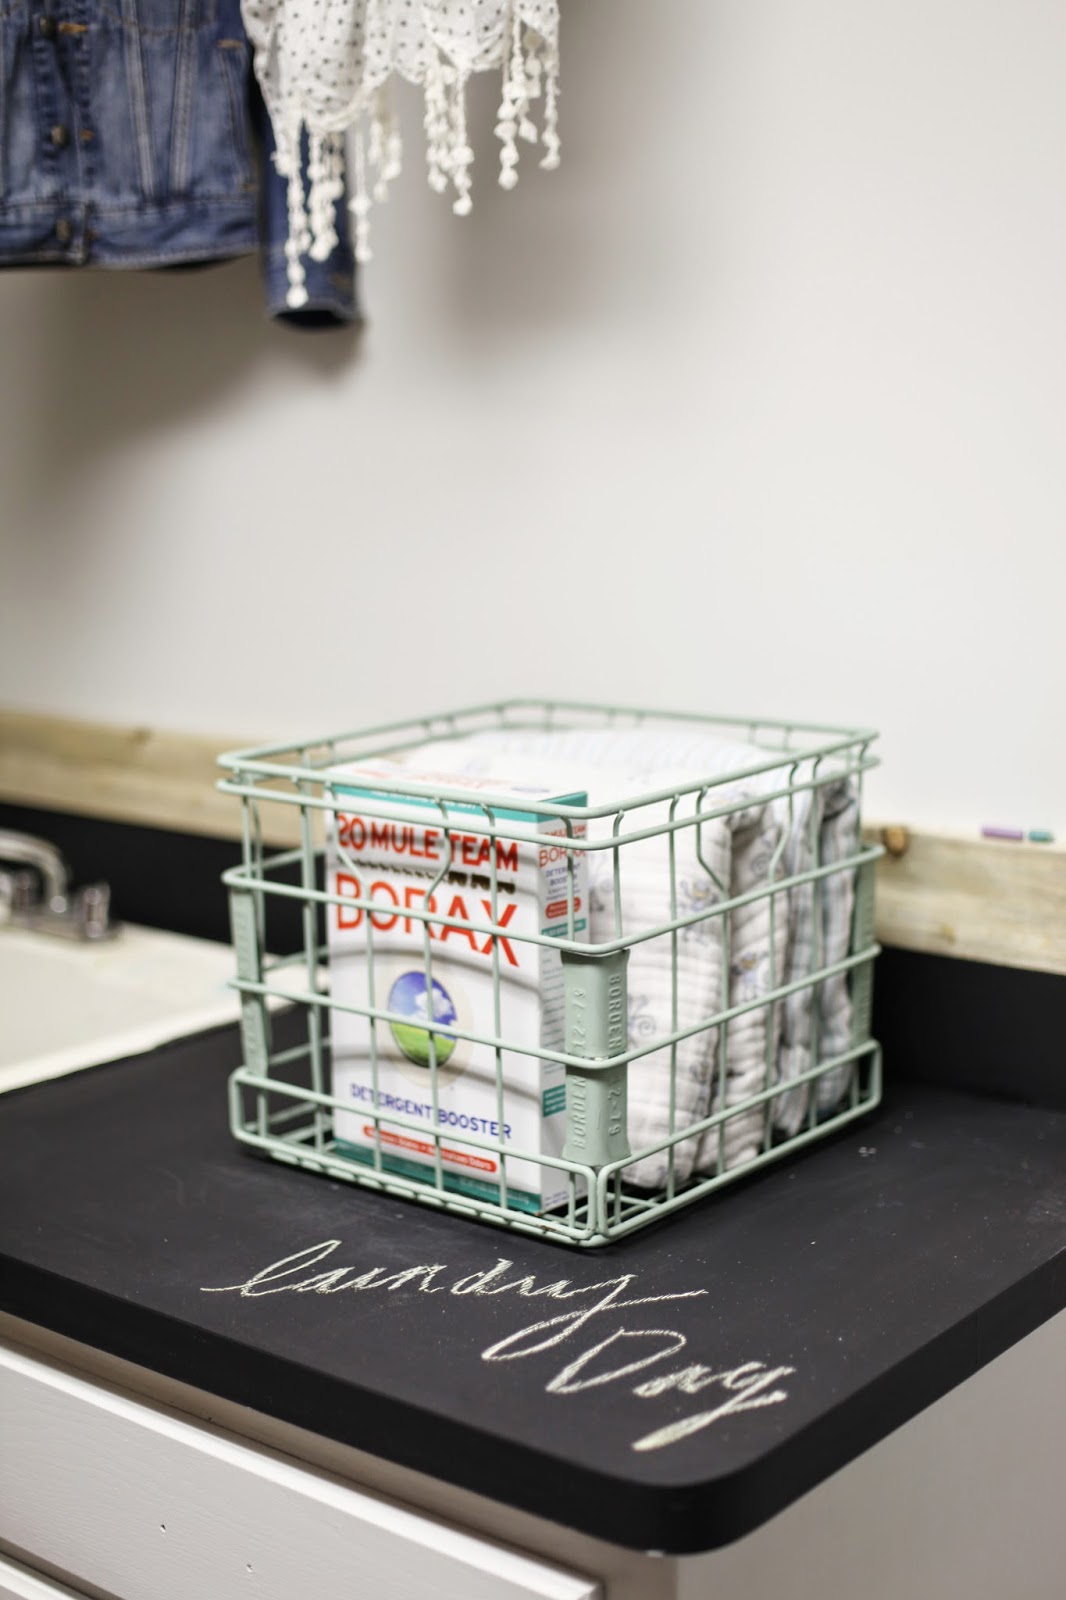
I always look around and feel like there is so much to do, that I can't ever complete any of it.  The truth is, I can!  It just takes a little time and imagination.  So I knew I wanted white, as the wood looks old and not so clean.  The yellow counter top is awful, but I wanted this project to be nearly free to do, so I decided to chalkboard paint the counter!  It turned out awesome, and I can write notes on it, or let the kids have fun!  I bought white valspar paint and primer in one, so I did not need to sand the wood first.  I painted the trim, cupboards and door.  It took 3 coats of paint.  I found this cute sea foam green crate at a garage sale.  
I will probably keep it stocked with borax and washing soda for my laundry soap.  Over 4th of July weekend we spent time with family on Leech Lake in northern MN, while at the beach I collected drift wood, with this idea in mind.  My father in law just about died laughing when I screamed "jackpot" from the other end of the beach.  The long piece is perfect for hanging things to dry or to throw a quilt over.  The little piece is perfect with hooks in it.  The sign is from grace & salt.  They do beautiful work, check out their shop, proceeds go towards their Ugandan adoption.

I made this growth chart for my boys, and love how it turned out.  If it is possible for me to make, I will, it just means more to me and my family that way!
I still need to get a new wash tub and tall faucet for this room, but without it, the cost was FREE, as I had all the paint in my garage left over from other projects.  Amazing difference with no cost.  I love projects like that!  Now onto the kitchen, new floor, painted walls, and a farm style table Jeff is making for it.  That project will be a little more.  


Monday, July 7, 2014

a solo trip to Charlston

My beautiful friend Suzi got married on June 21st in Mount Pleasant, near Charlston SC.  I went solo to this trip and really enjoyed a peaceful getaway and being at a wedding never disappoints, especially when the reception venue was right on the water!  Here are a few photos from my three day trip!  I loved photographing these two beautiful girls, they were a friend and the niece of the bride.


It was a beautiful trip, I missed home, but being away also makes me appreciate home more, and it gave me time for quietness and rest.  I like to step back and reflect on my life, what I can do to better it for my family and how I can take action on things I want to do.  Congratulations Mr. & Mrs. Smith.  What a beautiful trip it was.

Make time for yourself {a floral workshop}

When you hear someone say, make time for yourself, you may think pedicure, massage, or read a good book.  I love all those things too of course, but I feel we need to make time for our creative minds more, instead of pinning amazing ideas on pinterest all day, let's get out there and do these things we desire to do.  A few weeks ago I attended a floral workshop with munsterrose and  wit & delight at The Comn in Minneapolis.  I was so looking forward to an evening doing something that I usually wouldn't and even better learning to create, so I can continue to follow my dreams.  We had delicious cocktails and cupcakes, then learned how to arrange and care for Minnesota flowers.  
above are photos I took of my arrangement.   Here are some photographs that Melissa Oholendt took for the attendees.  


If I can choose "me time" things like this will be what I choose.  It filled me up and made me feel so happy.  I hope you can find something to do to make you feel that way to!


Saturday, June 7, 2014

giant italian crepe paper peony

This is my favorite craft to date!  I swoon over peonies, and can't get over their beauty, so I was elated to make a BIG paper one to hang in my studio!  Here is a link to the site where I purchased my crepe paper, http://cartefini.myshopify.com and here is their blog, which has a full tutorial that I followed, crepe paper peony!  I can't wait to venture off from the tutorial and use my imagination to make other things out of crepe paper big and small!  It is a little spendy, I think this flower costed about $30 to make, but it is a piece of art.  I hope ya'll go make one!  Creating beauty is what life is all about, I find such joy in doing so.
p.s how cute is the Madewell shirt I found at the thrift store for $4?!


Monday, May 19, 2014

Mini Rhubarb custard pies

I am a lover of rhubarb, but mine is not grown enough to eat yet, so when I saw it at the local market, I was anxious to make something delicious with it!  ($5/ per lb)  I was also serious about not messing my dessert up!  I always see people making cute hand pies, and pies in muffin tins, etc... So I decided to make mine in vintage ramekins.  I used a recipe I've always had for regular rhubarb pie, but added some stuff to make it custardy.

Ingredients.   4 large stalks of rhubarb chopped up  or about 1.5 lbs.
                      1 cup of sugar
                      2 eggs
                      all spice & cinnamon
                      2 Tbls flour
                     
In a large mixing bowl, coat your chopped rhubarb with 2 eggs, 1 cup of sugar, 2 Tbls flour and pinches of all spice, and cinnamon.  Once coated well, divide into 8 ramekins.


Crust: 1 3/4 cup flour
           1/2 cup veg oil
           pinch of salt
           2 Tbls cold water

combine crust in a mixing bowl, then divide into 8 balls and pat on counter, lay mini crusts on top of ramekins, tucking edges under.  Glaze crust with a beat egg and sprinkle with sugar

Bake @350 for 40 minutes, then turn oven to broil for 2 -3 minutes, (this will give your crust the golden crunchy goodness it needs!
I made this recipe twice to perfect it, the first was not a custard, this one is, and I'll never go back!  Enjoy.


Tuesday, May 6, 2014

Essential oil bug spray

I have always hated deet bug spray, but living in the thick woods in Minnesota, our options are limited, unless you want to walk around with 100 red itchy bumps all over your body.  I finally had enough with poison on our bodies and did my research and made my own essential oil bug spray.  The moskitos are not out yet, so I haven't got to test it, but according to reviews on similar bug sprays online, it ROCKS!  It smells awesome and you will get the benefits of the healing and relaxing properties the essential oils offer.  I liked the zoe organics ingredient list, and also a few others from health blogs and organic retailers.  I didn't know the amounts they used or anything, so I guessed, and I am thrilled with the outcome.
What you will need:
1 bottle geranium oil 
1 bottle peppermint oil 
1 bottle clove bud oil
1 bottle thyme oil
1 bottle lavender oil
1 bottle cedar wood oil
1 bottle lemon eucalyptus oil
about 5 oz organic sunflower oil (found at grocery store)
small bottle neem seed oil (found online or at whole foods, coop, etc) 
an 8 oz glass spray bottle.  You can use a smaller one, but this recipe is for 8 oz. 
 I ordered the oils from edens garden.  They are pure therapeutic grade oils and are a fraction of the cost of the young living and doterra oils.  
I poured about 4 oz of sunflower oil into my bottle, then about .5 oz warmed neem seed oil, and almost full bottles of each essential oil, I left about 1/8 in each bottle give or take.  Then continue to fill with sunflower oil.  Shake! This should last all summer, as you do not need much, it is so thick and nourishing, and diluted enough to be safe for young children.  If you are a person who likes things exact I would suggest ordering from a company that sells essential oil bug sprays.  I wanted more for my money, and love DIY, so I guesstimated, and can't wait to use this bottle of liquid gold on my family!

Tuesday, April 22, 2014

the BEST silicone popsicle molds... just like a gogurt. Happy Earth day!

I am always looking for good ways to make the boys healthier snacks.  They can clear out a box of gogurts in a day if I let them.  Recently on amazon I came across these perfect silicone molds shaped like a gogurt.  These looked a lot easier and more convenient than regular popsicle molds I have used.  I ordered them here.  They were only $12.99 for 10 of them!  I just tested them out with strawberry, banana, and plain greek yogurt, and another set with greek yogurt, banana and chocolate.  They were delicious, tasted like frozen yogurt of course!  The best part is silicone is safe, and it washes up so easily compared to plastic!  They also take up little space in the fridge/freezer.   I can't wait to try new recipes,  I may just refrigerate some filled with applesauce also, as the applesauce's to go are quite spendy!
Summer is coming, that means snack, snack, snack.... so I am preparing!  

Another great silicone container for applesauce, smoothies or yogurt is the silisqueeze.  We have three, but they are quite a bit more costly, as you will only get one for the price of 10 of these.
p.s these don't have to be for kids, these make awesome adult snacks... I love nutella and banana, I love a good treat too!
Happy Earth day!

Monday, April 21, 2014

Updated head shots for my website

Hello!  Most who read my blog know I am a photographer, I don't want this blog to be about that, so I separate it as much as I can.  However my love for photography is ME!  I live and breathe how I can capture my children better,  shoot clients of my dreams and how I can put a styled shoot together ( working on a bird release for our families next photos) FUN!  I absolutely love everything about creating, capturing, and making people look lovely.  Who doesn't want a new, updated good photograph.  Most women don't feel beautiful  all the time, I would say 80% of my life, I wake up get ready and don't feel very pretty, which is fine, I am not sad about it, I just don't have the time to make myself look very cute, that's all!  On Easter, I threw on a dress that's been hanging in my closet unworn for 3+ years.  ( I was finally brave enough to wear it, as it's kind of an old fashion dress)  which twirls amazingly!  I am sure I was the only one who liked it as my own husband stuttered when I asked his opinion, then he said, it's ok!? lol  But that is OKAY!  I had time to curl my hair too!  Anyway, I took some photos of my boys, then my oldest son took one of Jeff and I, and I asked him to take a few of me as I thought I was having a good hair day... :/  Here are some updated head shots from my 10 year old, and I am even using them on my photography website, as I really like how he captured me, it is a rare occasion, as I don't photograph the best.  So thankful to have boys who love using my camera too!  Let me or LOGAN know if you want updated head shots.  :-)  www.crystalsphotographymn.com


Friday, April 18, 2014

Easter baskets!

This year for Easter I wanted to create baskets for my boys that were unique and had some special keepsakes in them.  I didn't want anything extravagant, or all about candy, but something that was perfect for them.  I found the best bibles and devotionals for them on amazon.  Logan has been wanting the Action Bible as he says it tells the truth. The little boys love devotionals and bible stories. 
 These are also available at Scout and Morgan in Cambridge, but cost a little more.  
Here are the baskets.

I found the three matching baskets at goodwill.  The SUPER balls at walgreens, Minecraft T-shirts at Target, books on amazon, here is a link to these sweet little folkmanis mini puppets. ( which are also at scout and morgan).  The name tags were found on etsy.  They were super cheap and in my mailbox with in 3 days of ordering.  I love having little kids in my home, it will forever be my favorite thing to make them feel special and teach them about the Lord, I love reminding them of the true meaning of Easter, and Christmas, it especially melts my heart when I see them act on the true meaning with out being reminded.  Yesterday we were coloring eggs, and writing on them with crayon first, little Landon asked me to write "he is risen" on one and "jesus loves me" on another.  It melted my heart.

Happy Easter.


Wednesday, April 16, 2014

Make your own body butter- beeswax lip balm- coconut oil deodorant

***UPDATE*** after the lotion is liquid, put in fridge until its soft butter consistency, then whip with hand mixer for 4 minutes, it makes is soft and fluffy.  The original way made it hard.  :)
Today my sister and I made lotion, lip balm, and deodorant.  If you ever look at your mile long list of ingredients on your bottles of body care, you will see it's not pretty.  The aluminum, and preservatives, and tiny traces of really bad stuff that builds up in our bodies.  A ladies skin especially is absorbent and sensitive as after we shave our glands are open, and can let those chemicals and metals in our lotion absorb more easily.  
The body butter turned out great, it is more of a butter than a lotion,  and is so nourishing.
Ingredients
1/4 cup coconut oil
1/4 shea butter
1/4 cup bees wax
1/4 cup almond oil or olive oil
add these ingredients to a large jar, and put in a saucepan half full of water ( double boiler) on medium heat until melted, once melted add essential oil of your choice and add to a glass jar.  It will turn solid very fast.  I added carrot seed essential oil and lavender, both are great for your skin.  


All ingredients were purchased at my local natural foods store, but also can be found online, or at whole foods, etc...
The body butter can also be used as a great diaper cream for babies, and is great when cloth diapering as most store bought creams stain them and also are NOT good for babies skin.
The lip balm was similar to the body butter,
Ingredients
1 tbls beeswax
2 tbls coconut oil
2 tbls shea butter
melt in double boiler, 
add essential oils, lemon and peppermint were good,
add to small containers or empty chapstick container.
I LOVE how this turned out, it is perfection!


Finally is the deodorant...
It turned out great, but needs to be kept in the fridge!  (not very handy, I know)  I am going to make a different kind, as I didn't like to it got soft when left out, but I DO love how it felt!
It was a combination of baking soda, corn starch, coconut oil, and essential oil, (cypress).
This turned out awesome and I will use it when I am in the kitchen! ;)  However I did see other more solid recipes, I believe the beeswax helps make them more solid.  To order great essential oils, check out edens garden.  Here is a funny picture my sister took of my trying my new deodorant!  Every thing is more fun when you act a little crazy...

 
I would love to fill my cupboards with all of this goodness!  It makes me so happy whenever I switch anything to something natural and organic.  Our bodies deserve to be cared for, I for one am suffering from unexplained numbness, tingling of hands, face and neck at times, MRIs say I am fine, but I don't think I am, I am not being dramatic, I think my body has inflammation that also causes these symptoms.  I need to make a drastic change to my health.  I juice and do other healthy things, but still have so much that I can eliminate.  If you have any great things that you make, take or love let me know!  My next venture is going to be making my own tooth paste.